Cart
Cart is empty.
Click here to buy

Why should you use all-natural bug repellents?
Most bug repellents contain DEET (N,N-Diethyl-meta-toluamide) as an active agent. But DEET based repellents aren't just hazardous to mosquitoes. From a human health point of view, when mosquito bites are more of a nuisance than a serious health threat, choosing a botanical based repellent makes more sense. The most serious concerns about DEET are its effects on the central nervous system. Although it is very effective in high concentrations, the risks are also increasing with the concentration. Experts recommend that when using DEET, it is best to wear long sleeves and long pants, when possible, and apply repellent to clothing rather than skin to reduce exposure. Following all these precautions reduces risk, but does not eliminate it. There are a number of effective, less toxic insect repellents available. They need to be applied more frequently than DEET based repellents, but they do not carry the same health risks. In this article we collected ways to repel bugs without these harmful chemicals.
Prevention
When talking about indoor insect protection, a mosquito net is essential. In the garden, make sure you eliminate all standing water: empty the saucers of flower pots, clean the rain gutters, and change the water in bird baths and pet's bowls at least twice a week. Always keep your rainwater collection system closed, and bury any puddles.
Did you know that bats are your allies in the fight against insects? Some species of bats eat 500-1000 mosquitos in one night! Make your garden bat-friendly and enjoy the benefits!

Keep them away
Many plants have bug repelling essential oils, so you can keep the bugs away to some extent by simply planting them in your garden, windowsill or patio. Basil, lavender, lemon balm, lemon grass, thyme, mint (especially catnip), rosemary, and lemon eucalyptus are the most effective herbs against them. If you aren't allergic, you can even rub the leaves on your skin which makes a simple, but weak insect repellent. Among flowers, geranium, chrysanthemum, marigold, giant onions and petunia can be beneficial for this purpose.
Of course the essential oil of the plant is much more concentrated, and thus more effective against bugs. If you are interested in essential oil based repellents, we recommend you the Galaktiv Bio Mosquito and Tick Repellent, and the Stadelmann's Citronella-Geranium (Insect repellent) oil. For your pets you can use the GalaktivBio Parasite stop!
If you prefer the DIY way, follow the instructions below to mix your own spray against bugs:
Oil-based insect repellent spray:
Ingredients:
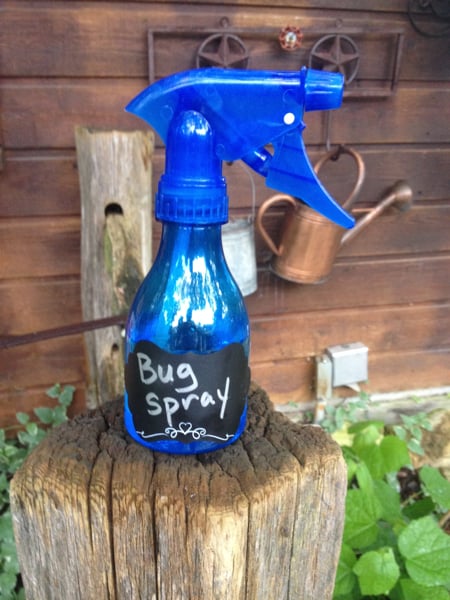
All you have to do is mix the ingredients in a spraying bottle! Shake well before every use, and store it in a cool, dark place. Why do we recommend these ingredients? Neem oil has a component called sallanin that has insect repelling qualities, which even enhances the effect of the essential oils. And of all the insect repelling essential oils, the best weapon against mosquitoes is lemon eucalyptus oil, which according to the CDC can be as effective as DEET.
This spray is oil based, so you shouldn't apply it on clothes. But if you want a lighter water based version, you can substitute the neem oil for distilled water, or witch-hazel flower water and/or aloe gel.
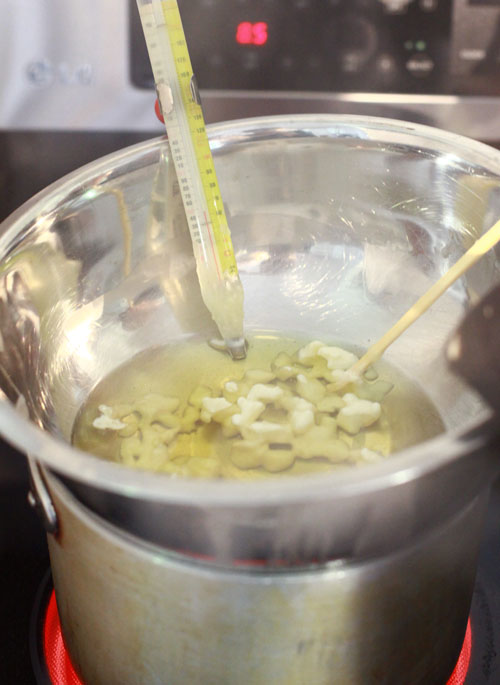
On summer nights spent in the garden, a citronella candle can be a life-saver. Did you know, that you can make your own at home without artificial fragrances and mineral oil? This is what you need for the candle:
For the preparation, you will also need:
1. Cover the surface you will be working on with newspaper or parchment paper because beeswax is hard to wash off.
2. Cut the beeswax to smaller pieces so it can melt more evenly.
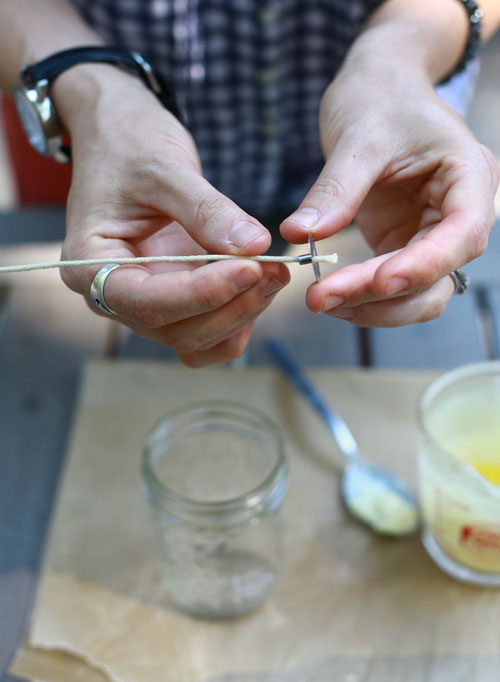
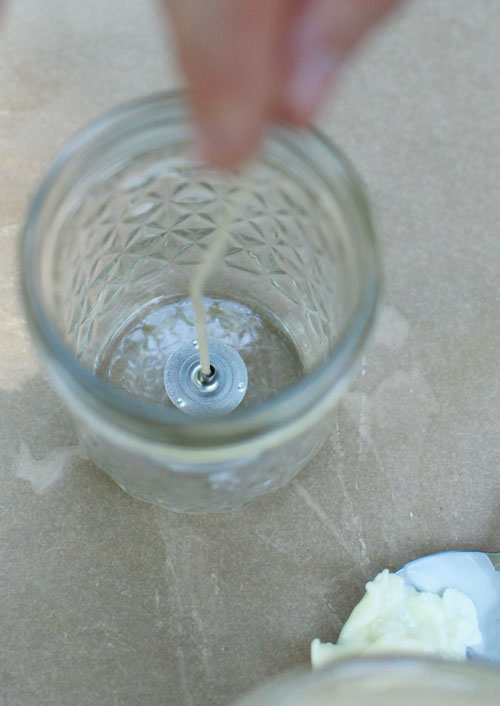
4. When the wick is ready, thread the wick through the hole on the tab. Use pliers to squeeze the threading hole, closing it tightly around the wick. Place the wick/wick tab into your candle holder/vessel. Set aside.
5. Heat the beeswax up again to 70°C, take it off the heat and add the essential oils.
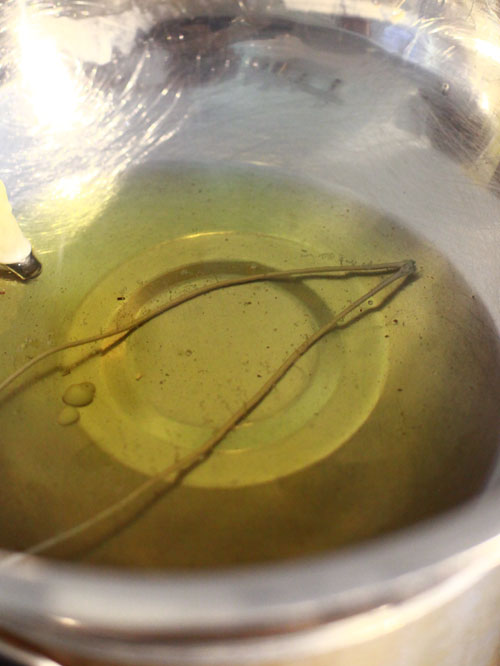
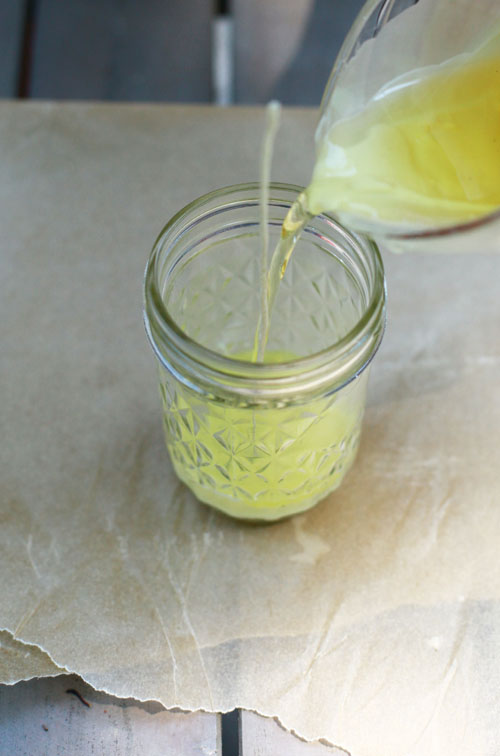
6. Pour approximately a quarter of a cup into the heat-proof spouted container, and put the rest back on top of the hot water.
7. Pour 1-1,5 cm beeswax in the candleholder, where the wick is. This step helps to anchor the wick, keeping it in place as the rest of the candle is poured.
8. Warm up the beeswax until it liquefies again. Pour it in the spouted container. You may need to use your stirring utensil to incorporate any wax that has solidified in the spouted container with the new hot wax.
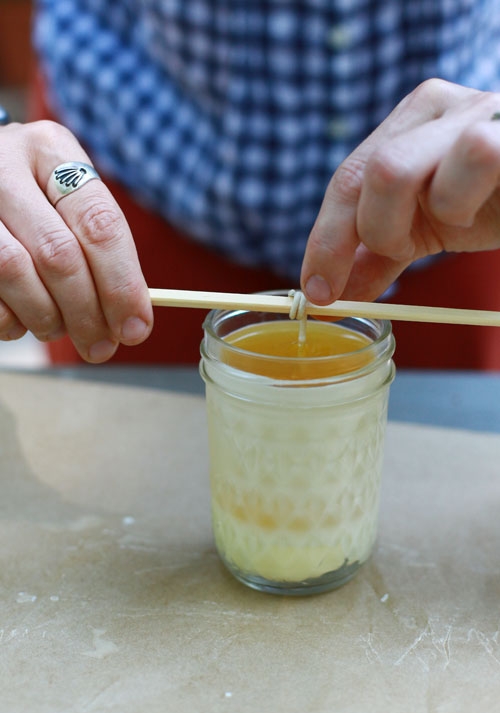
9. Pour the beeswax in the candleholder. Gently wrap the top of the wick around a wick stick, centering it in the middle of the container. Be sure not to tug too tightly on the wick during this step, as doing so could dislodge the wick from the wick tab, causing it to float to the top of the melted wax. Rest the wick stick on the center of the container/mold and allow the candle to cool completely.
10. Once the candle has cooled completely, remove the wick stick. Trim the wick to 0.5 cm before the first use, and after every use, especially if the candle is in a glass container (be sure to provide this crucial tip to others, should you gift them with your homemade candles). Otherwise a lengthy wick could overheat the glass, causing it to spontaneously shatter.
What to do with insect bites?
Of course sometimes you can avoid a bite, but don't worry, we have solutions for that too! The Stadelmann's Insect Bite Oil, the Naturissimo Ice balm and the St Luke's healing oil are all quick soothing remedies for the itching and burning feeling. There are also many common household items that can help you alleviate the pain. In case of a bee sting, apply a paste of baking soda and water on the skin. You can further enhance the effect by substituting the water with witch-hazel flower water. Aloe Vera gel is also very beneficial as with many other skin irritations. Among essential oils, tea tree, lemon, peppermint, chamomile, basil and lavender are beneficially cooling and soothing the pain. Use them by mixing 1-3 drops of one of these oils in a teaspoon of olive oil. Gently massage it in the skin. And finally a heat-friendly tip for summer stings: ice the bite so you will reduce the itch and the heat at the same time.
Many thanks to Design Sponge for the Candle DIY!
For a full list of bug-repelling plants in your garden, read the article of Backyard Boss!